Testimonials are one of the most effective forms of marketing content. They give potential clients the chance to see for themselves the value you provide with your business.
There’s no better salesperson for you than a happy customer.
This type of video marketing may seem pretty straightforward, but it is all in the way you show your impact. For video testimonials, it is essential to show your impact. It is not enough for the subject to simply say that you helped them. The key is to focus on the how.
For example, an explainer video shows your potential customer why your product is great, but a testimonial actually shows them how others have succeeded by using your product.
You can bring this by focusing on metrics, cause, and effect, and doing a before-and-after structure, which will allow you to show exactly how your brand saved the day. And you can do all of this without going deep into video production.
In this article, we will go over our top tips to make a storyboard for customer testimonial videos that will help you map out what you want to film with ease.
5 Tips for Testimonial Storyboard
AIDA Format
We would recommend that your video content be a maximum of 90 seconds. Remember the AIDA format–Attention, Interest, Desire, and Action? Keeping AIDA in mind, here is a 1-minute video of a customer testimonial you could consider as your baseline.
10 seconds: Attention and Interest – Introduce your hook, the person/company giving the testimonial
40 seconds: Desire – Provide details on the exact problem your brand helped solve and any impact metrics
10 seconds: Action – End with a strong call-to-action
If you are working with a 90-second duration, you can spend up to a minute on the main section and 15 seconds on the introduction and call-to-action.
Creating Your Testimonial Storyboard
Coming to the storyboard, you can make this as detailed as you like. A storyboard essentially has three parts–the visual, the shot description, and the script (e.g. dialogue, voiceover, etc).
You can do this on your computer, on a whiteboard with your team, or simply on a notepad. Make a three-column table. Label these ‘visual’, ‘shot description’, and ‘script’. You can even add a separate column for voiceover, camera angles, background music, or add all these under shot description. It is totally up to you.
However, we would recommend that you give each frame of your video its own panel. This means every time the camera angle, speaker, or shot location changes, you will add a new row for it. This may seem a bit tedious at first, but it is crucial to map out exactly what you need to film.
Next, we will help break down what should go in each section.
The Visual
Video production can feel intimidating, but it need not be. Just follow some simple steps for great results. Let’s take visuals for example – like the header suggests, this space is for you to add what the viewer will see on the screen for this particular scene. Here, you can draw or sketch what you want to show. Or, you could use images or screenshots from other videos to fill out this space.
For this kind of video, one of your opening scenes may be a mid-shot of your speaker (that is from their head to their torso) and a lower third at the bottom of the screen that mentions their name and designation.
Shot Description
This part of the storyboard needs the highest level of detail.
In the shot description, you can add camera angles, the type of shot (e.g. wide or mid-shot), the setting, etc. If your shot is of a logo or some text you want to animate, you can draw in arrows to indicate how it will move on the screen.
The Script
And finally, we come to the third column–the script. This one is pretty straightforward as you can copy and paste the relevant bits right from your video script. However, be sure to indicate which scene or sequence it is a part of. Also, remember to add whether it is part of the voiceover or a dialogue between speakers.
Testimonial Storyboard Template
Scene 1
Duration: 0:00 – 0:05
Visual
Wide shot of an office, camera pans from right to left to capture chaos: sirens going off, employees running around, papers flying everywhere.
V/O: When our coffee products suddenly went viral on social media, let’s just say things at the sales office got a bit crazy.
Scene 2
Duration: 0:06 – 0:11
Visual
The same office, but things are calm. Mid-shot of different employees working at their desks and smiling.
Audio: Chatter of employees
Zen music
V/O: But now thanks to Salesforce’s inventory management services, things look more like this.
Scene 3
Duration: 0:12 – 0:17
Testimonial speaker sitting in a suit against an office cubicle background
Reference image: https://i.ytimg.com/vi/zkuvkI9LJdE/maxresdefault.jpg
Mid-shot
Lower third with speaker’s name and designation
Peppy acoustic audio track
Speaker: When Salesforce came to us, we were struggling. We had no way of managing orders effectively and getting them out on time.
Scene 4
Duration: 0:18 – 0:28
Cutaway: Group of employees in a meeting, applauding
Wide shot and slow zoom
Same peppy acoustic audio track
VO: But after getting their services, we’ve been able to improve our workflow by 43% and double our response rates. Our customer service ratings have just gone through the roof!
Examples of Brand Testimonial Videos
Let’s now take a look at three effective examples.
Watching these will help you come up with scenes/sequences you want to replicate for your own storyboard.
Capital Ortho
This is a super-effective marketing video despite being just 45 seconds long.
Although it’s somewhat like a supercut of testimonials, in the second half there’s still that focus on what this medical service really gave to customers — a new lease on life, freedom from health anxiety, and the ability to enjoy the things they want to do even in their old age.
If your video or service is something quite forward and not technical which needs some context, this is a great format to try out.
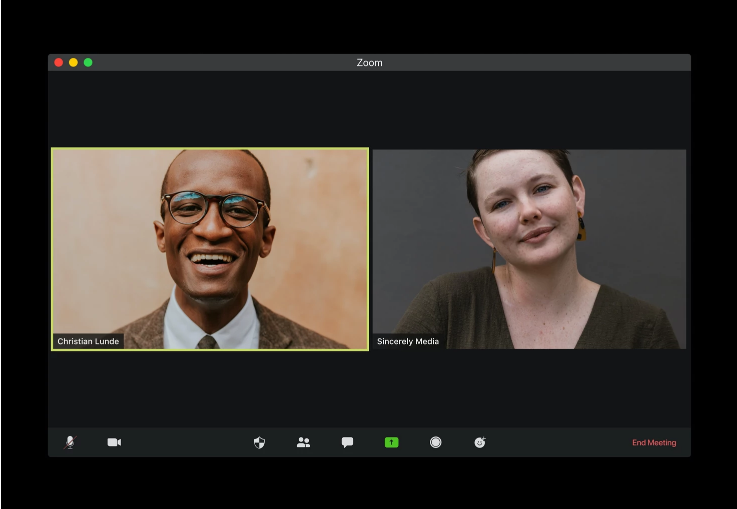
Zoom
Next up, we have this testimonial for Zoom by their client, HubSpot. Here as well, the feature is talking about how Zoom helped the company transition to remote working.
Leading from that, he talks about how Zoom has helped facilitate all those spontaneous conversations and meetings that happen in an office–and therefore, overhauled productivity.
Remember to always dive deep into that emotional benefit beyond the functions of your product or service. This video does that extremely well and introduces it within the first 30 seconds.
We also see the Zoom and Slack interfaces in this video as the customers interact with them. This is another super important aspect, especially if yours is a SaaS product.
Freshbooks
The final testimonial video was made for Freshbooks, a cloud accounting service. This is a rather simple sit-down video, but it takes the first 30 seconds to set the context about how chaotic this customer’s accounts system was.
A considerable portion of the video is spent on this, and at the halfway mark comes the hero of the story — Freshbooks.
Another great thing to learn from this video is the order in which the benefits are presented. Initially, we hear about the obvious ones — more control and organization around one’s finances.
The kicker comes at the end, where the customer says that Freshbooks allowed her to earn more now that all her documents are streamlined and freed up her time. This is that kind of seal-the-deal clincher statement to add to your own video.
Are you looking for a Testimonial Video Storyboard?
Now that you have got our top tips on creating a video testimonial storyboard, it is time to hit the drawing board!
If you are in need of more inspiration, check out YumYum Video’s guide + roundup of 7 great testimonials.
Looking for a quick and easy way to put your video together? ChopChop has got your back. Our super-intuitive online video editor helps you create compelling videos with zero stress.
We have got all the tools you will need for a killer testimonial video – sharp titles and graphics to highlight your impact metrics, a wide-ranging audio catalog to help build the mood, an in-built voiceover recorder, and more.
You can sign up for access here. Also, if you’re looking for more tips on video storyboard template, or brand storyboard examples, follow our blog.